
Foodscape :30
Last November, Hinge’s Look Development Lead Jonathan Beals was featured in 3D Artist Magazine. His photoreal architectural rendering featured NVIDIA’s Iray renderer, and the buzz attracted the attention of the team at NVIDIA. They approached Hinge Digital and asked us to road test a brand new Iray plugin for Maya in development at 0x1, and we were delighted to put it through its paces with a new original project.
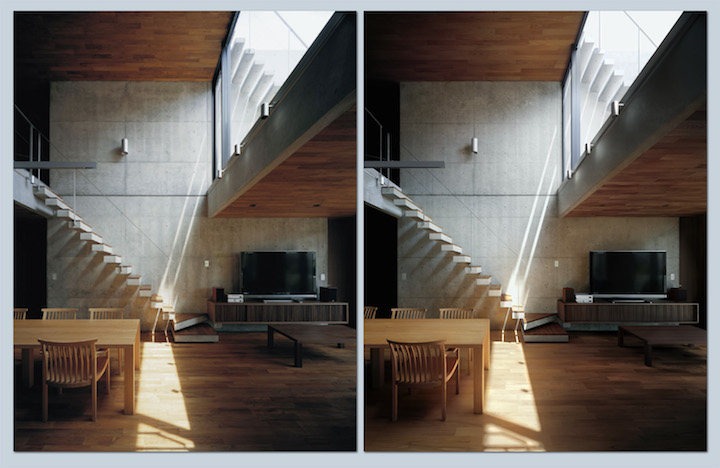
- Jonathan Beals’ Architectural Rendering using Iray in Autodesk 3dsMax
We began with doing some preliminary research on Iray. Iray is a brute-force, path tracing renderer. According to NVIDIA Advanced Rendering: “Iray is an intuitive to operate, interactive, consistent, CUDA GPU accelerated, high-performance global illumination rendering technology that generates photo-realistic imagery by simulating the physical behavior of light. Unlike current ray-tracing renderers, Iray does not depend on complex renderer specific shaders and settings to approximate global illumination. While also running on CPUs, Iray achieves its high level of performance by taking full advantage of the CUDA programming model, allowing interactive previewing on both single and multiple NVDIA GPU platforms. Iray progressively produces final frame photo-realistic images, with changes displayed as interactive frame rates.”
Iray is best used on a capable CUDA enabled GPU such as the NVIDIA GTX or Quadro series cards. For this project, we were fortunate to be able to use the Quadro K6000, which has 12 gigs of on-board memory. Memory is crucial for this sort of project because the amount of memory on the graphics card limits how much an artist can render on the GPU. Iray can also render on the CPU, but it can render up to three times faster on the GPU, and we wanted to take advantage of the enhanced speed.
Iray also has some amazing functionality, such as its Nitro mode in which you can run a single frame on an entire farm’s worth of computing power. The speed is incredible. With this functionality, an artist can truly tune a scene in real-time.
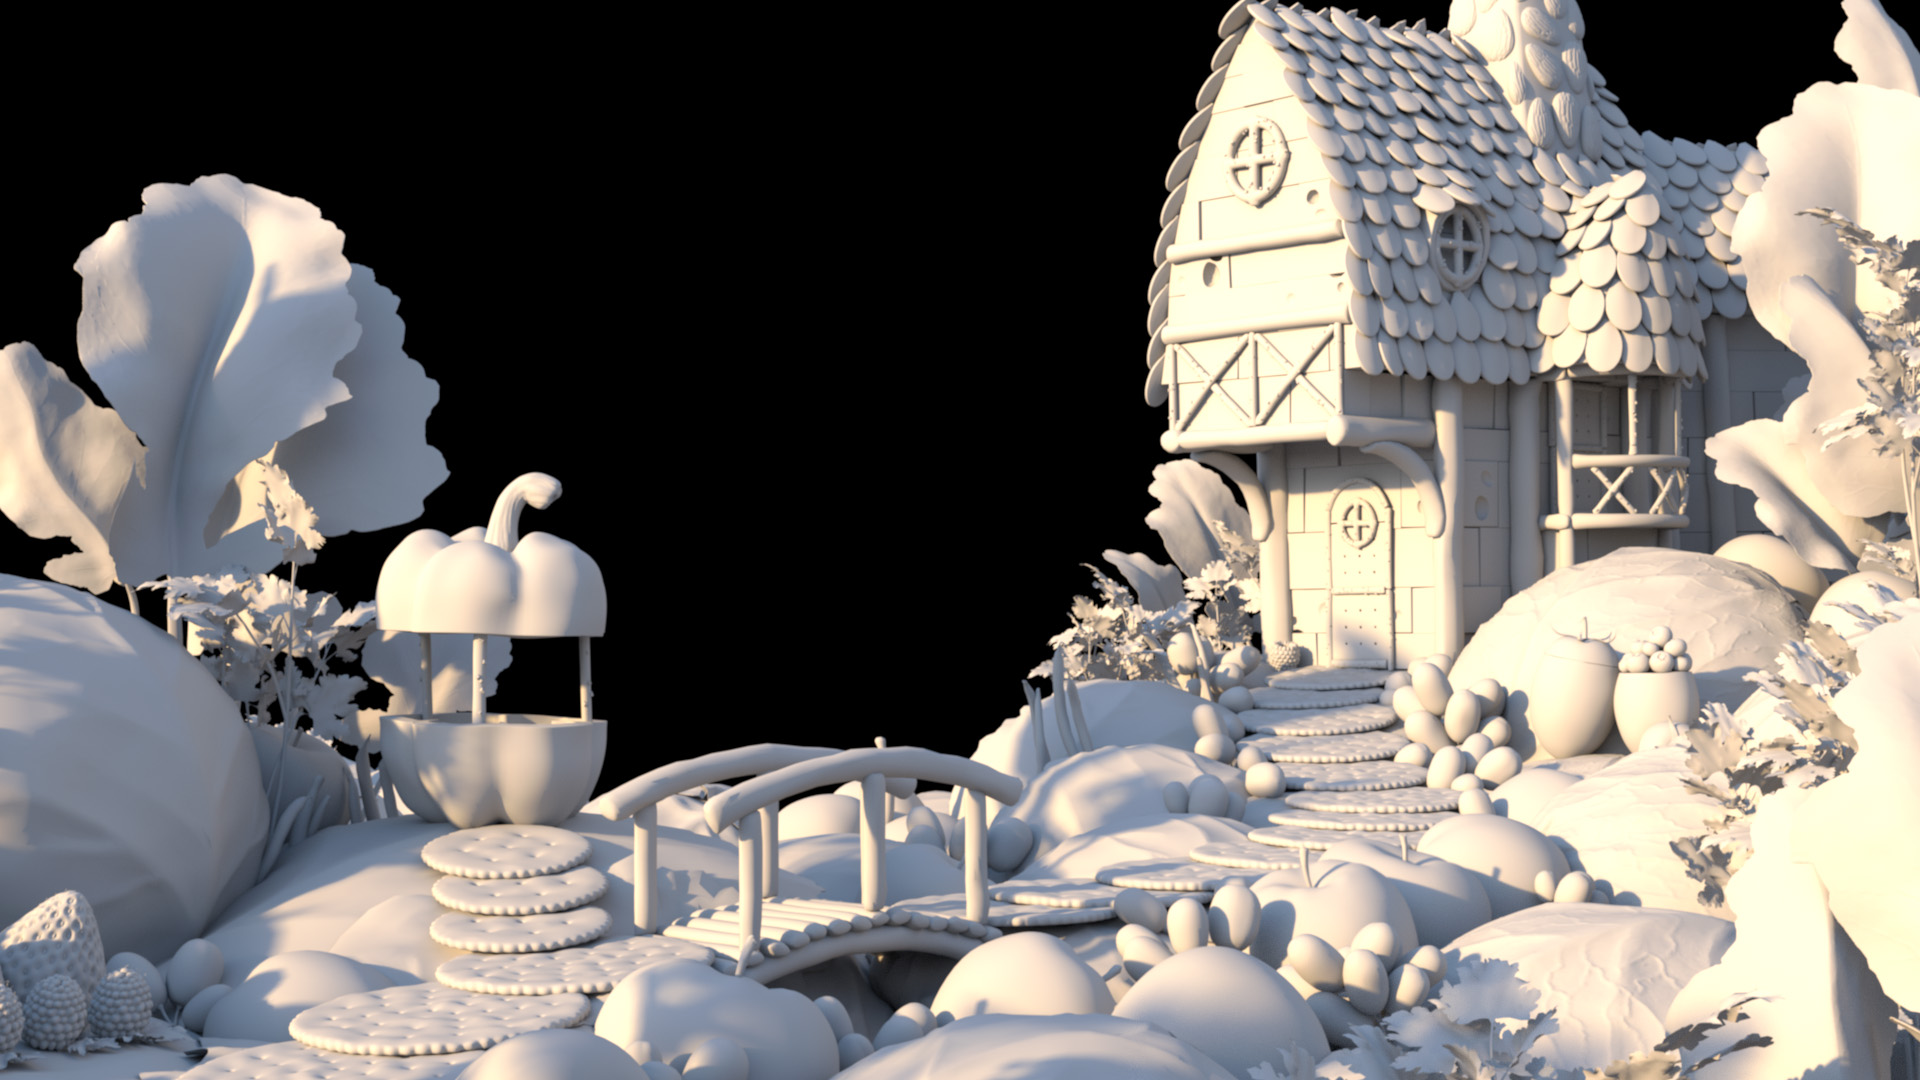
We already knew that Iray excels at creating photo-realistic hard-surface scenes, but creating believable food is a trial for any renderer. We decided to test the alpha release with a food-intensive scene, and asked Art Director Tyler Kenworthy to come up with concept art that would truly challenge the software. Here is his initial idea:

- We chose a still life instead of an animation, because at the time, the plugin was still in its infancy and we didn’t know how well it would be able to handle deforming geometry.
Layout and Look Development
Once we had the initial concept, we began layout and look development. Layout is the process in which the parts of a scene are arranged and where camera moves and positions are established. Look development is the process in which an artist designs the appearance of an object or character, establishing the material feel and textural quality.
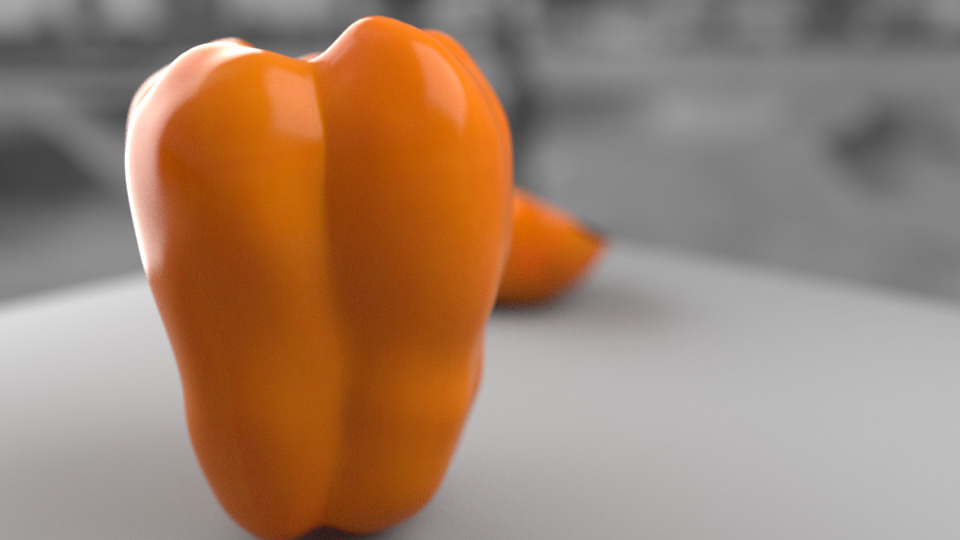
- Early look development scene for the bell pepper.
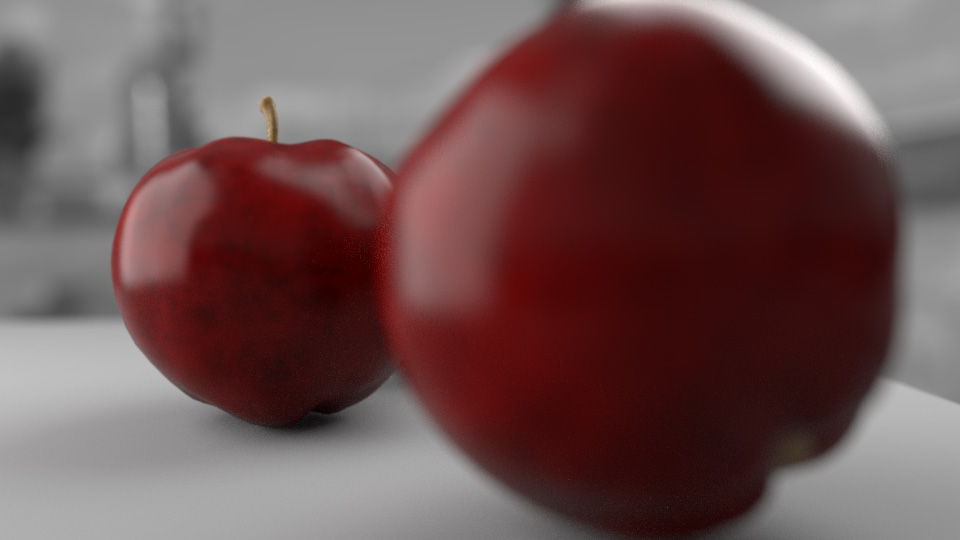
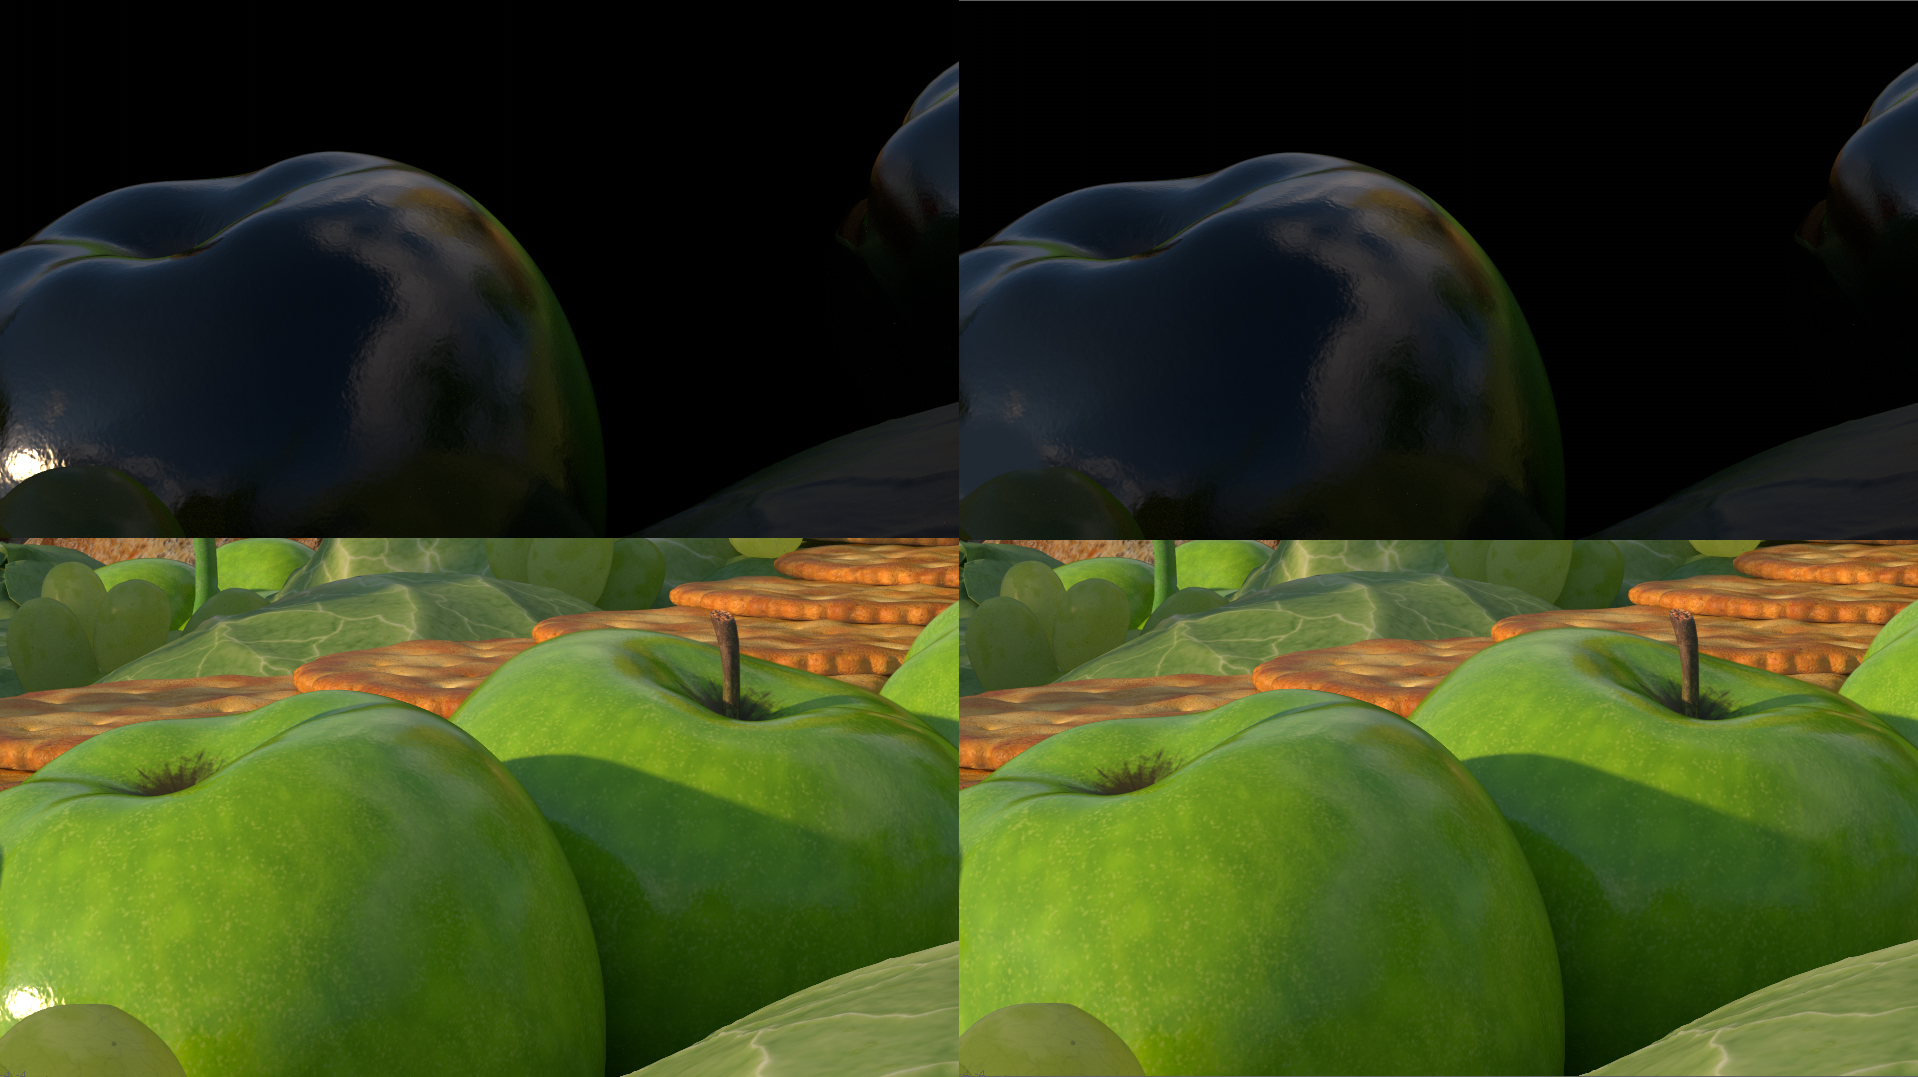
- Early look development scene for the apples.
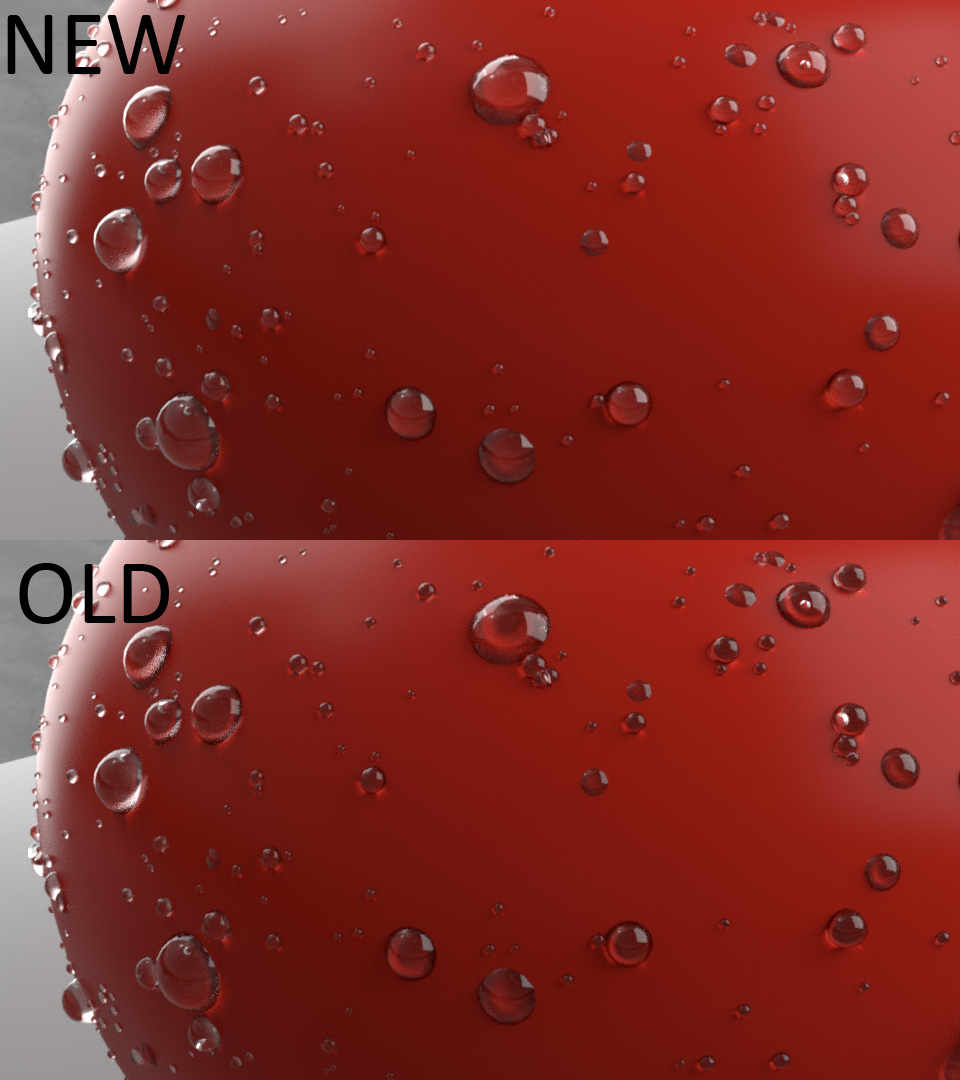
- Screen grab of working with the 0x1 team to get an accurate caustic from the water droplets.
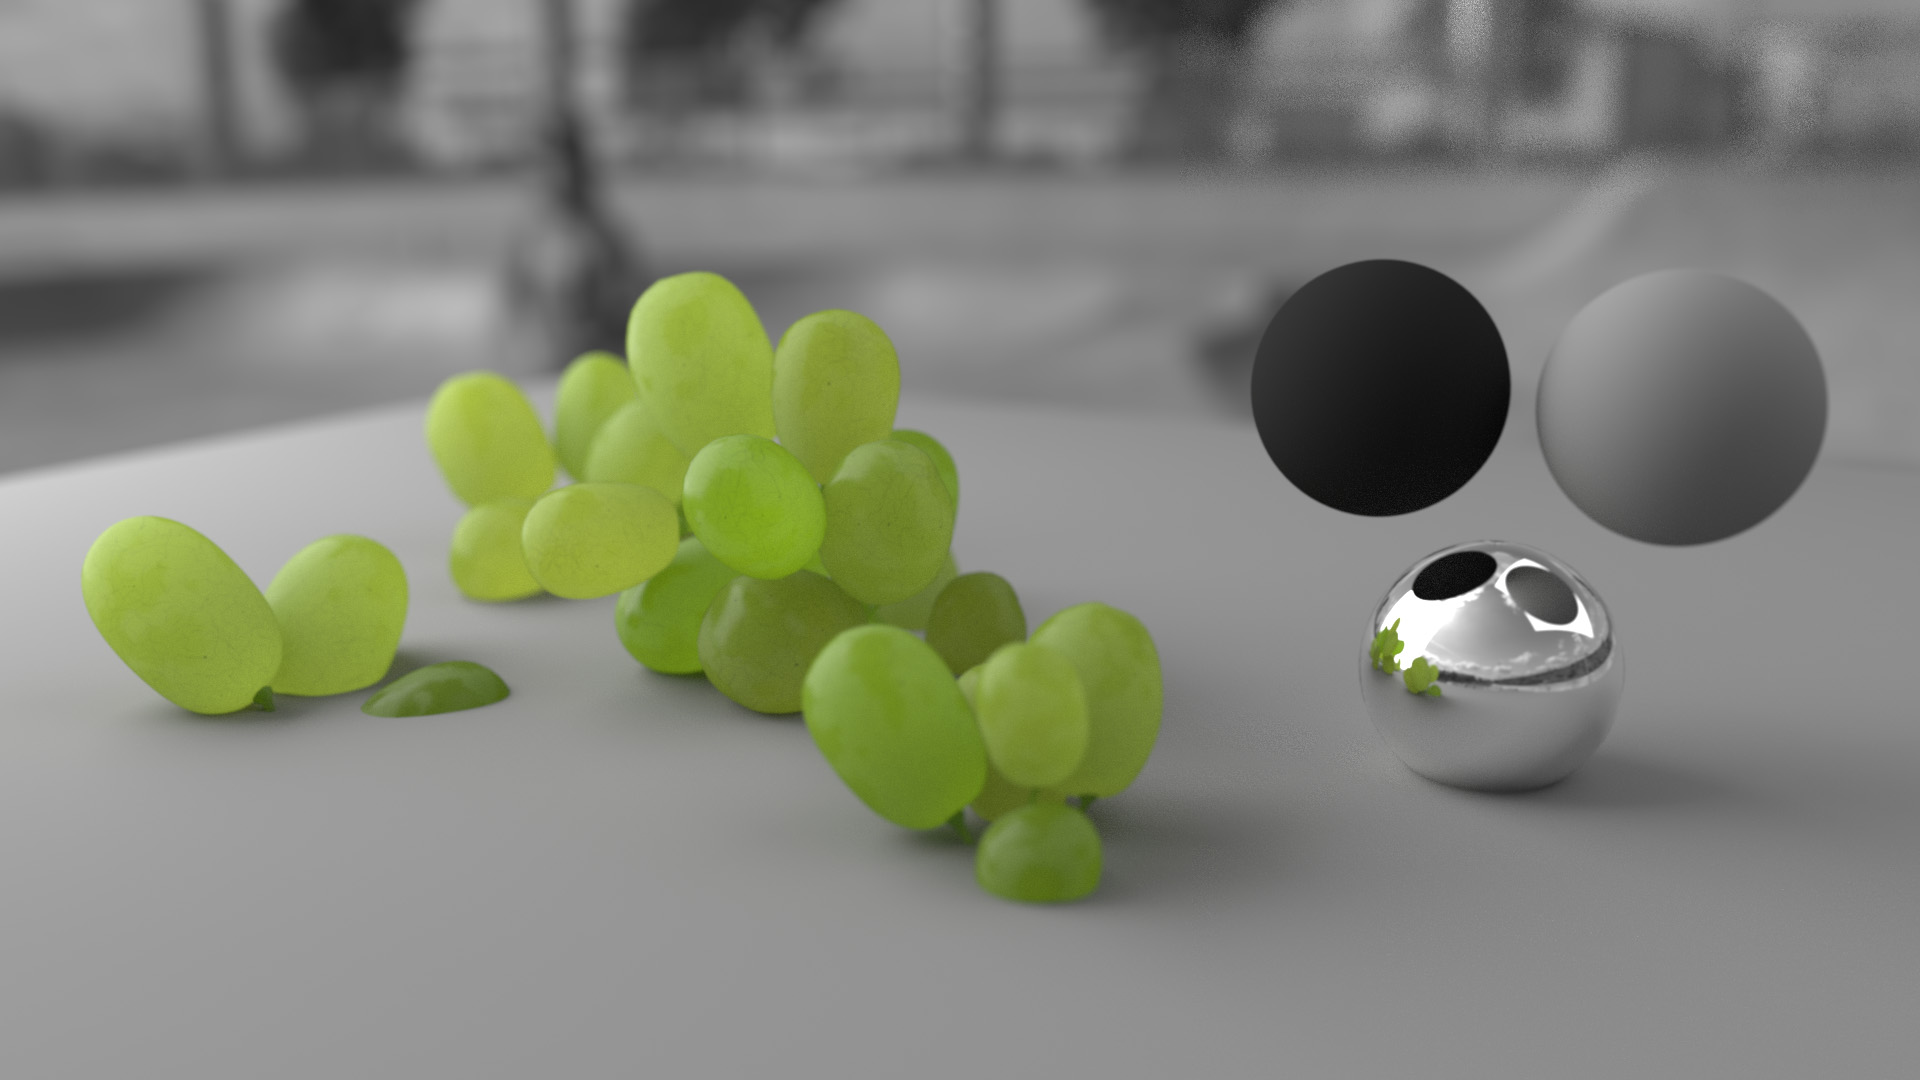
- Early look development scene for the grapes. Notice the 3 material spheres for lighting and material reference.
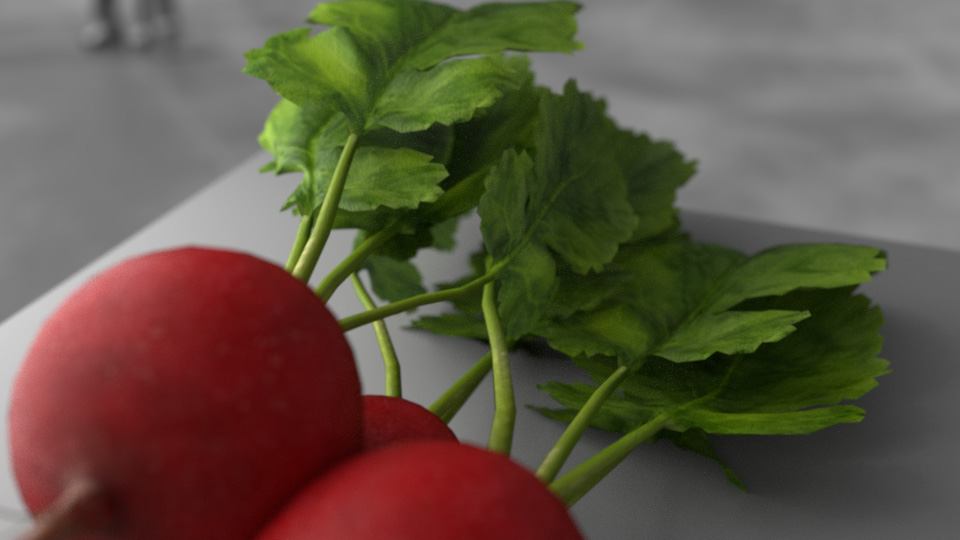
- Early look development for radish and radish leaves.
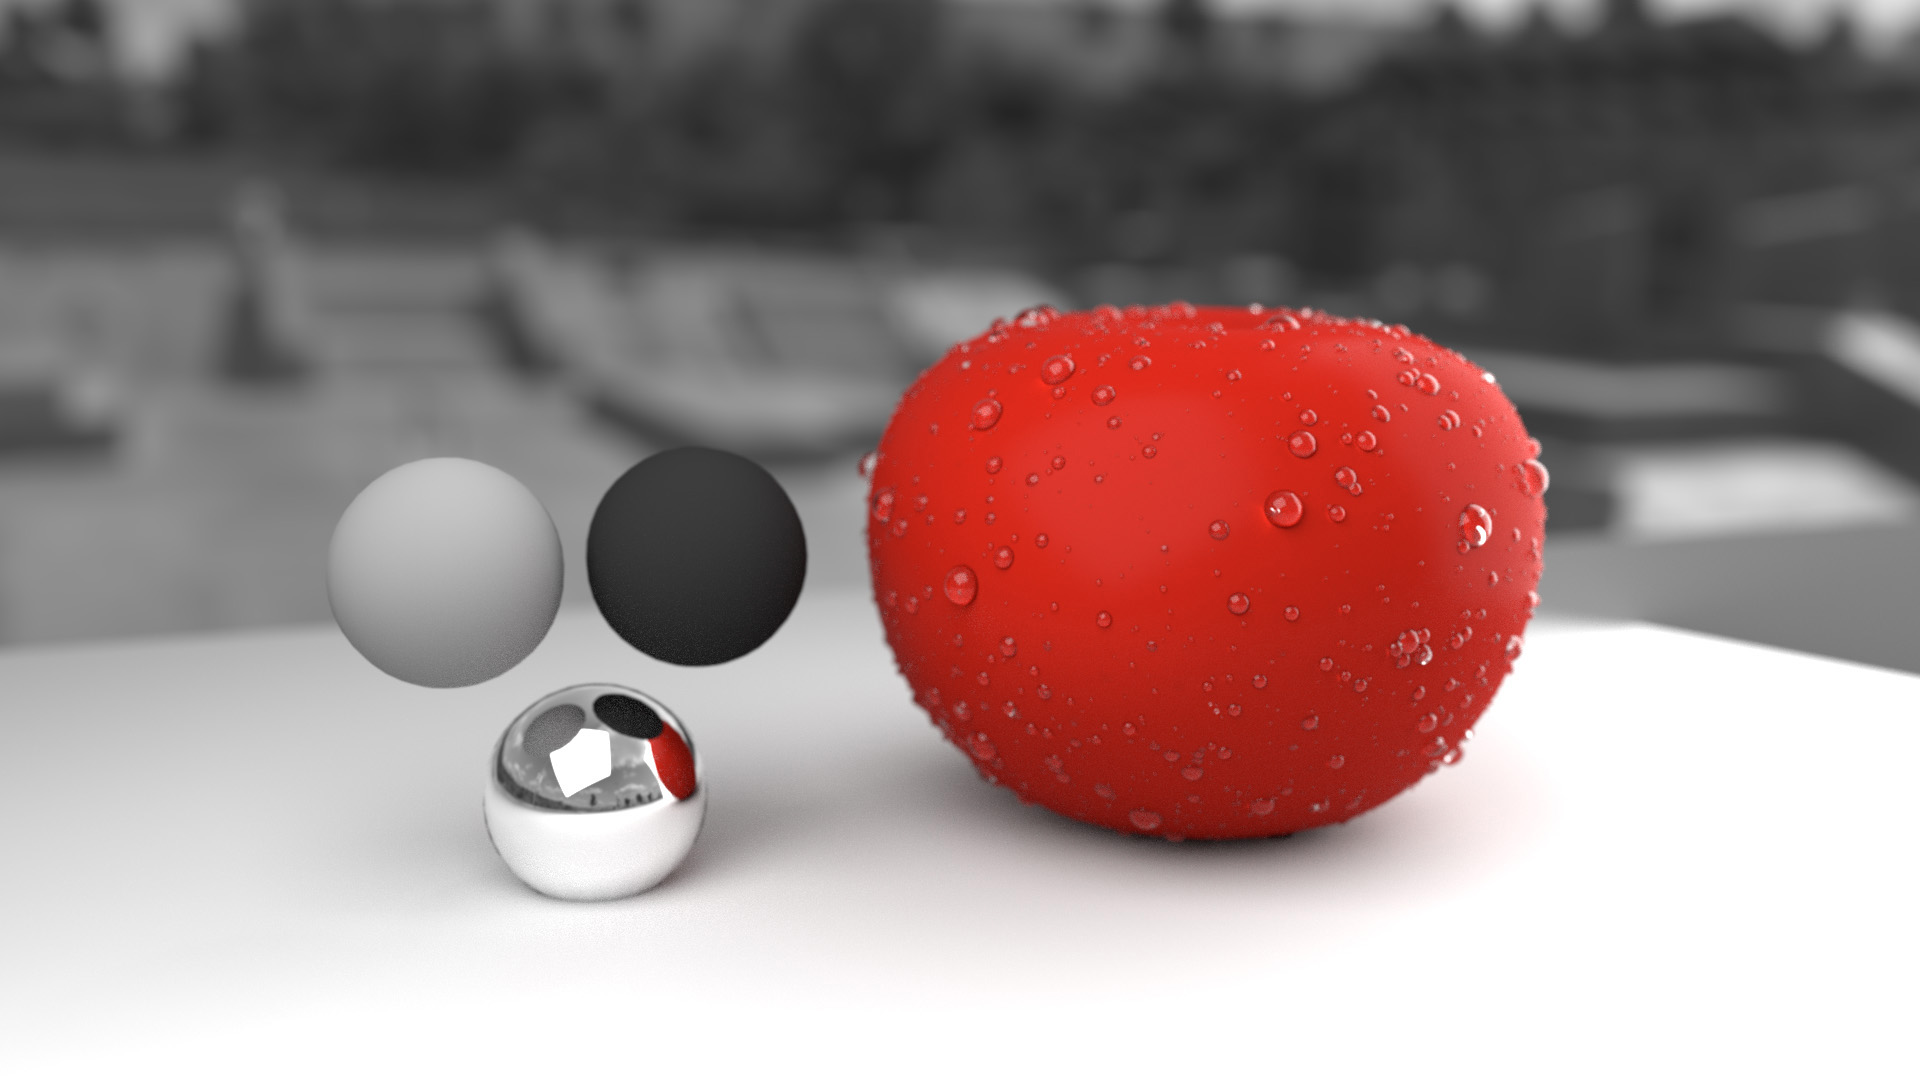
- An early look development scene for the tomato.

- A later look development scene for the tomato.
During the look development phase, we encountered some of the typical difficulties that come with using new software. There was no existing user community, online forums, or knowledge base to turn to when the inevitable question arose. However, the teams at 0x1 and NVIDIA provided excellent documentation, and overcame the nine-hour time difference from Germany to respond quickly and effectively when we needed additional support.
Lighting
Once we had the look of our main assets, we started lighting the scene. This was by far the easiest part of the process. All we had to do was throw in an HDRI, rotate it where we wanted it, and render. Iray handled the 5k HDRI like a champ and rendered the scene beautifully while keeping all of the sharp details of the HDRI. The noise patterns created from Iray are some of the most film-like we have seen. And we didn’t see any zippering or banding effects.
- An early lighting test with a different HDRI than what was used in the final animation.
- The final lighting used in the animation.
Material Definition Language (MDL)
The very cool—and probably most notable thing—about Iray is its Material Definition Language (MDL). MDL provides the ability to create incredibly lightweight and artist friendly UIs for materials. When you write the MDL, you only include what you need to define your material, so your UI doesn’t get clogged with unnecessary nodes. Of course, Iray comes with a number of pre-made MDL materials so you can get started right away. In fact, mental ray users will be pleased to see a familiar looking material that is similar to the structure of the MIA material.
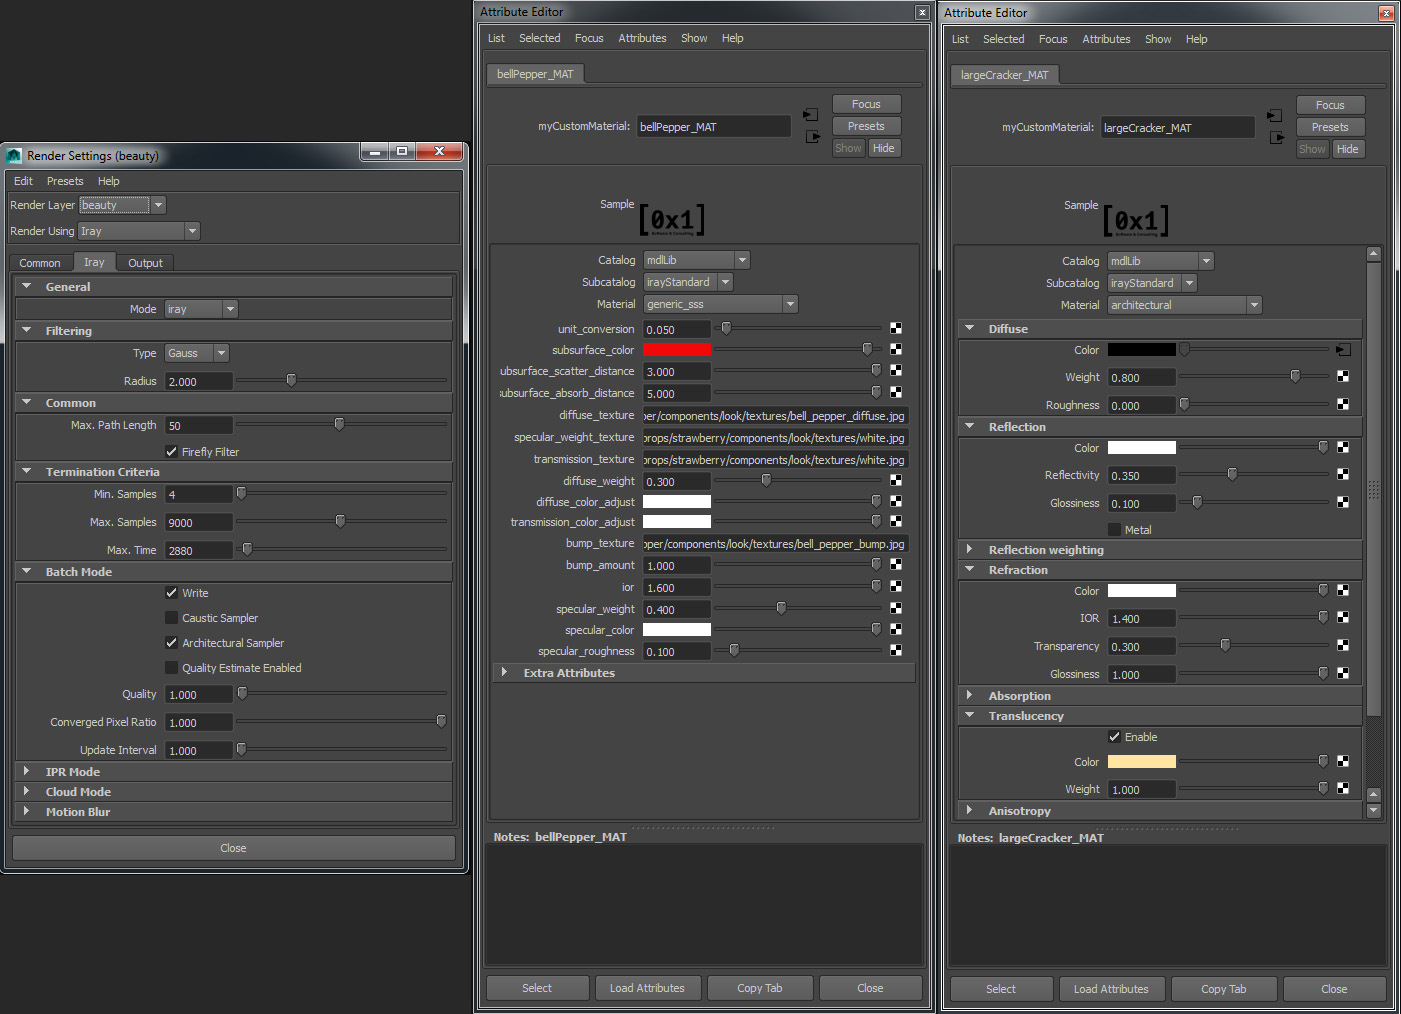
- Screen grabs of render settings and MDLs available through 0x1’s Iray plugin for Maya.
As you can see, the nodes only include what you need. You can create an uber shader that does everything, or you can create the bare minimum to give to your shading artists. You can keep everything self-contained in the node so you don’t have a bunch of extraneous nodes in your hypershade, or you can create it so it resembles the look of a more traditional material tree.
After lighting, we added the materials from our look scenes, did a bunch of tweaking to get colors and material attributes correct, and rendered it.
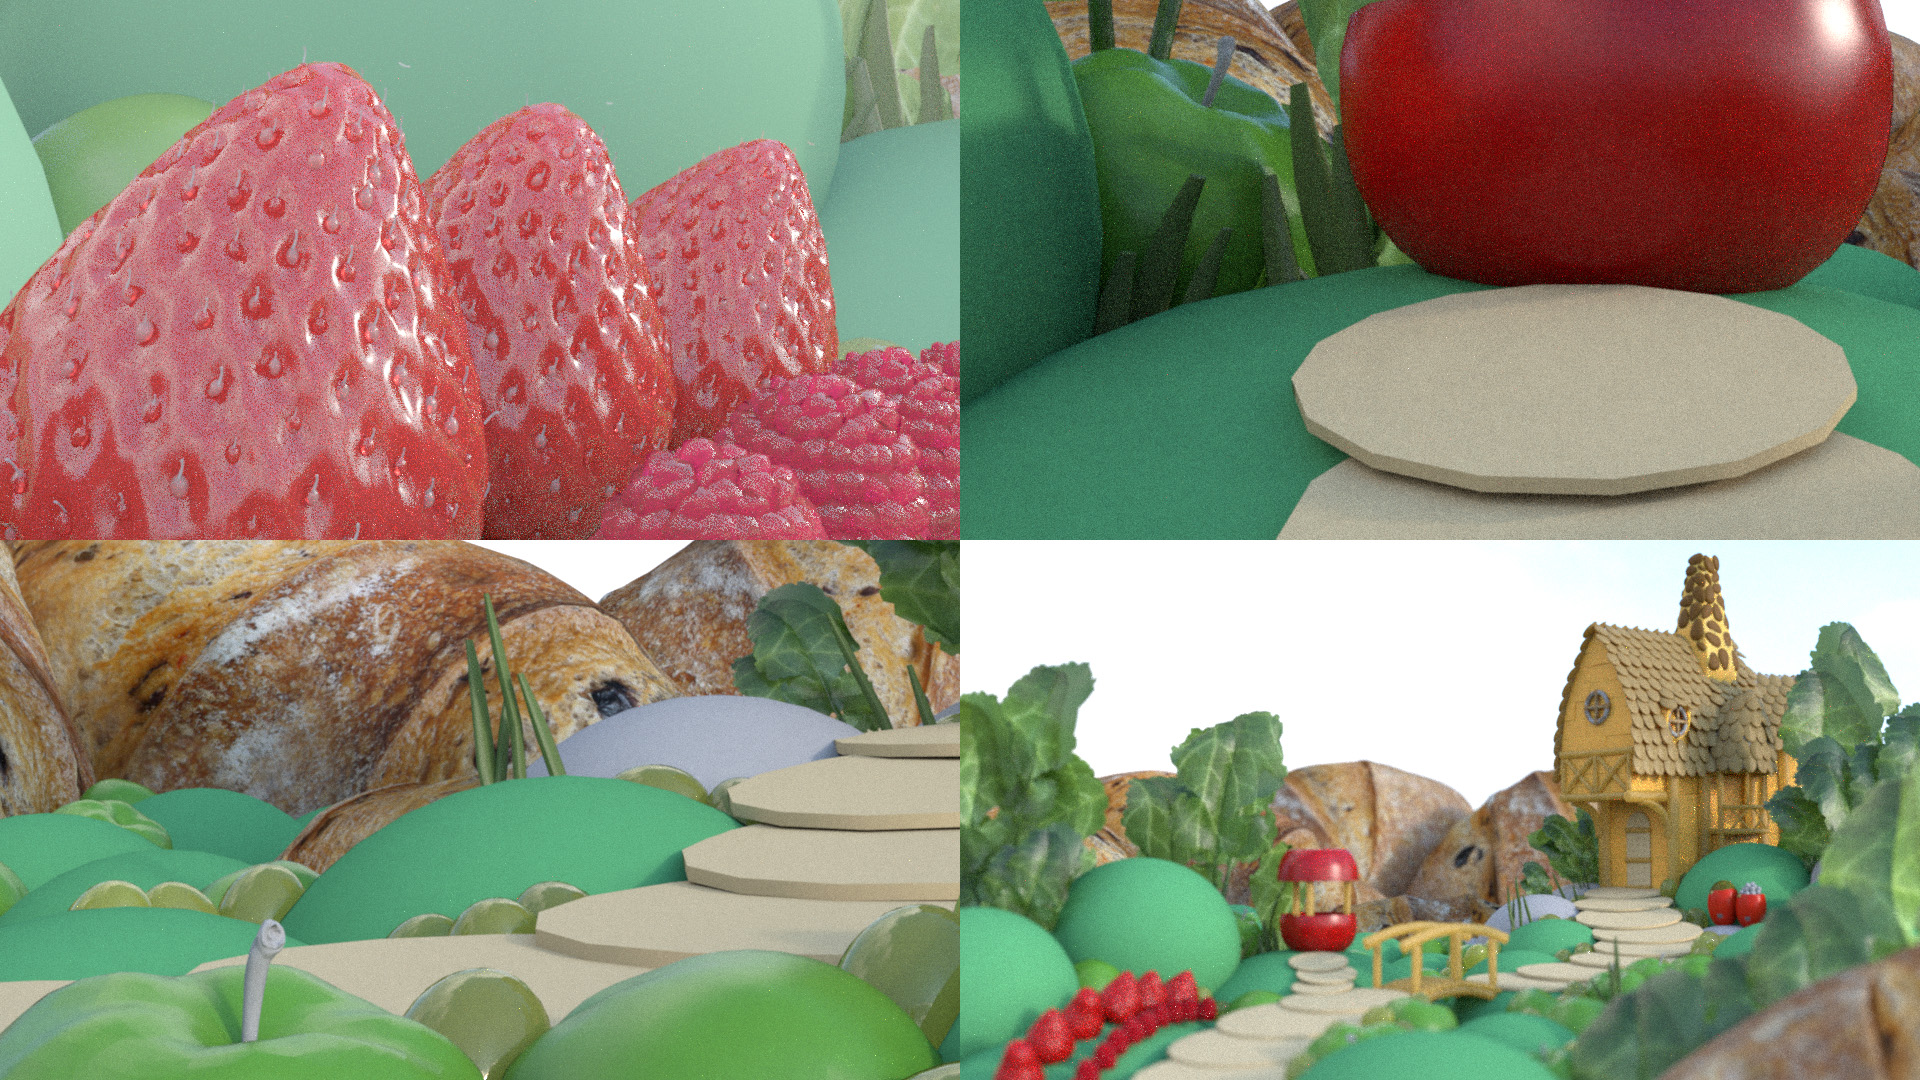
- Early work-in-progress renders showing the evolution of the scene through look development.

- Raw Beauty render. The white outline around the objects was caused by an issue of separating the HDRI contribution from the alpha. We needed to use a LPE to fix this. The LPE needed was “L.+E”.

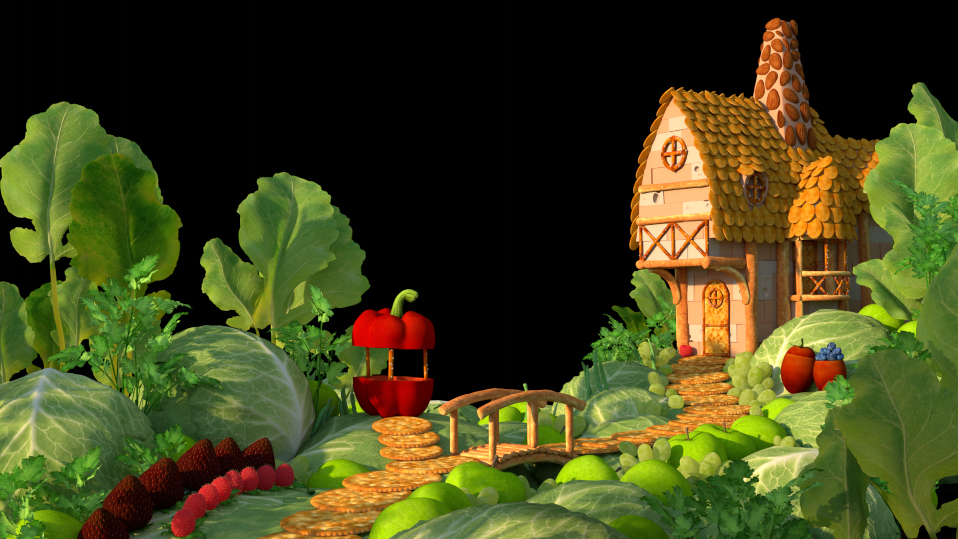
- Final RAW render of the animation.
Part of our testing goal was to see how well Iray could integrate with other render engines. Our thoughts immediately drifted towards Arnold and V-Ray, two big players in the world of VFX and animation. We wanted to add hair to a few objects, but were concerned about hitting a poly limit on the GPU’s memory. This felt like the perfect opportunity to render the hairs with Arnold, using the same HDRI. To achieve the look we wanted for the strawberry close-up shot, we combined passes from Iray, V-Ray, and Arnold, all using the same light setup.
Light Path Expressions (LPEs)
Another fascinating aspect of Iray is its Light Path Expressions (LPEs), which are fully customizable. LPEs allow you to split up a render into any imaginable amount of render passes. You can literally create any sort of pass you need, even a pass that only has the information of luminance that bounces off of object A onto object B. No other renderer gives you this level of flexibility.
In our project, we used general LPEs that could be combined again to match the original beauty perfectly. We used diffuse, glossy, specular, depth, and normal passes. In the early version of the 0x1 plugin that we used, matte passes with Iray were not possible so we used mental ray and V-Ray to create these passes, as well as a world position pass. Now with the latest beta version of IrayforMaya the object_id and material_id passes are exposed so in the future for us Iray can render out these passes.
Compositing
Armed with a bunch of render passes, we assembled our shots in The Foundry’s NUKE node-based compositor. With all of these passes at our disposal we were able to manipulate our shots without having to re-render as often. For example, on the apple shot we found a distracting highlight on one of the apples, but we were able to paint it out only in the glossy pass, leaving the other passes untouched and preserving the apple’s texture.
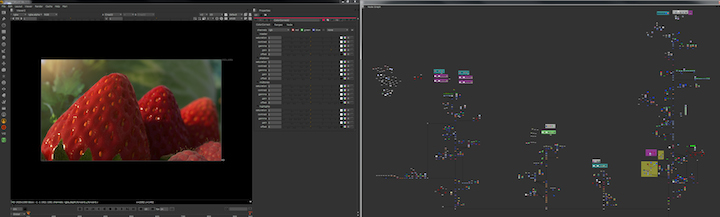
- Screen grab of the NUKE node tree.
- Before and after render of removing the highlight caused by the sun.
Because it was the longest and the most complex, the house shot took a lot of time and effort to achieve the exact look we wanted.
- RAW diffuse pass for the final shot.
Color Correction & Depth
We started by color correcting the reds of the pepper and the strawberries. Next, we used a projected UV texture on the cheese to punch up the realism and subsurface quality. We then painted in a background in Photoshop, and added it to a 3D primitive inside Nuke. We imported the camera directly from Maya into Nuke, and used it to render the textured primitive, which gave us a background that was perfectly tracked to our CG and which we could update with out having to go back to render. We used V-Ray to generate a render-id pass, which we used to for mattes through out the shot, as well as to add color variation to the roof’s pumpkin seeds.

- Beauty with some color correction on the house and red fruits and vegetables.
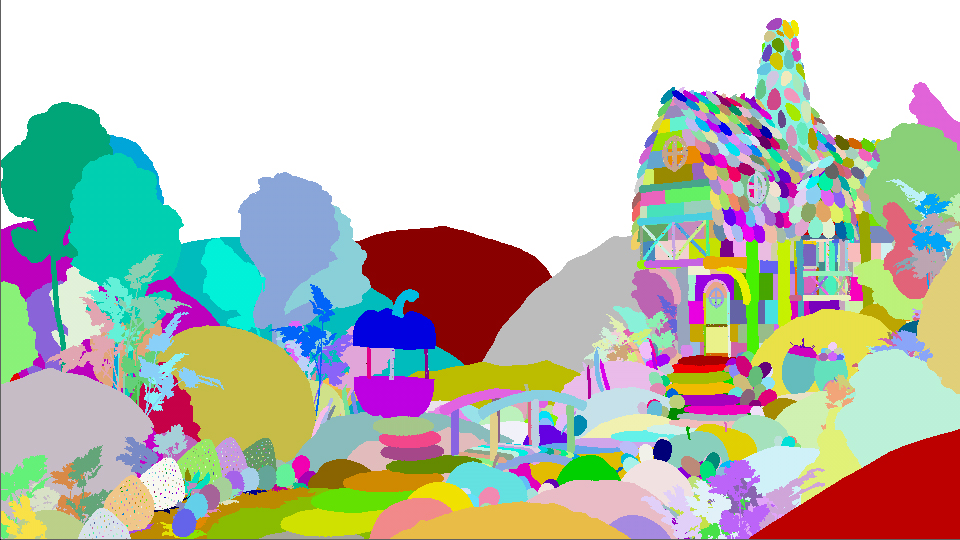
- ID pass used for color correction in NUKE.
Another important pass we employed was the distance pass, which puts the distance of the object from the camera into the float pixel data. We used this to add atmospheric fog and, most notably, depth of field, giving us the final photographic look.
Conclusion
Our ultimate goal was to create a fanciful scene showcasing appetizing organic materials using 0x1’s Iray plugin for Maya, and we were more than happy with the end result. Iray’s highly optimized GPU acceleration allowed our artists to interactively tune both lighting and shaders in scene. Iray’s powerful MDL and LPE features made material development and render pass output very customizable. Its ability to also render on our CPU render farm gave us additional flexibility. Even though it was still in beta at the time, the software worked surprisingly smoothly. We would recommend Iray and the Iray for Maya plugin from 0x1 for anyone looking for a powerful and versatile real-time rendering solution. We are pleased with the usability of the software and look forward to putting Iray to the test again in our next production.
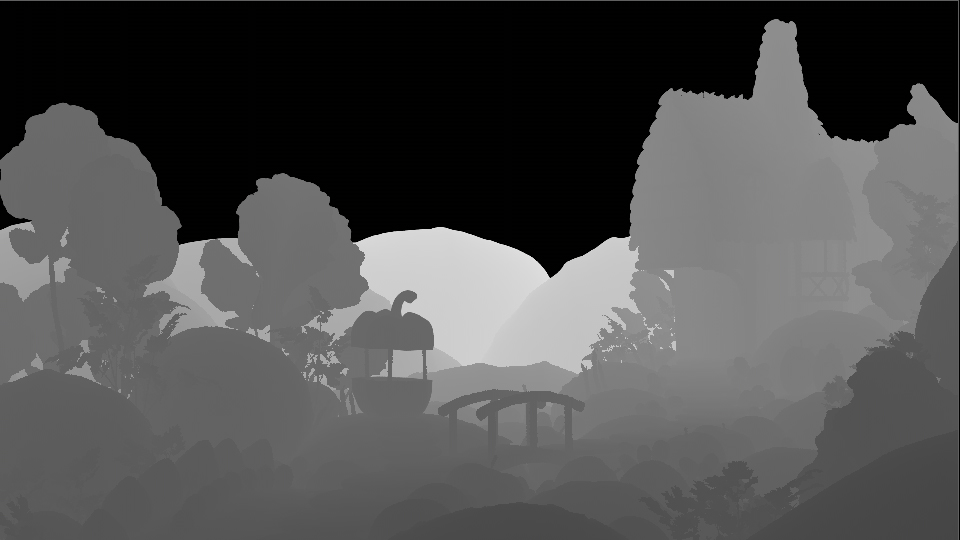
- Z-Depth pass used to add atmosphere and depth of field in compositing.
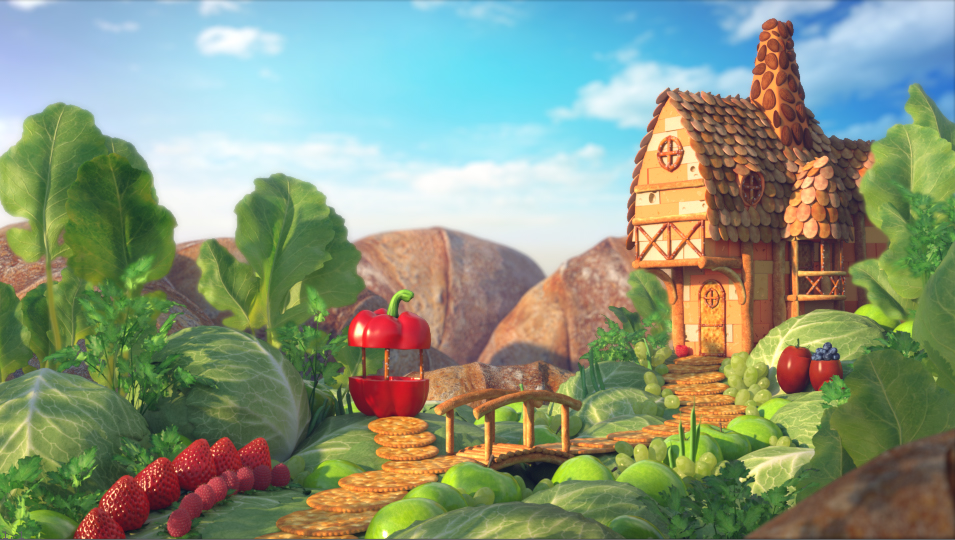
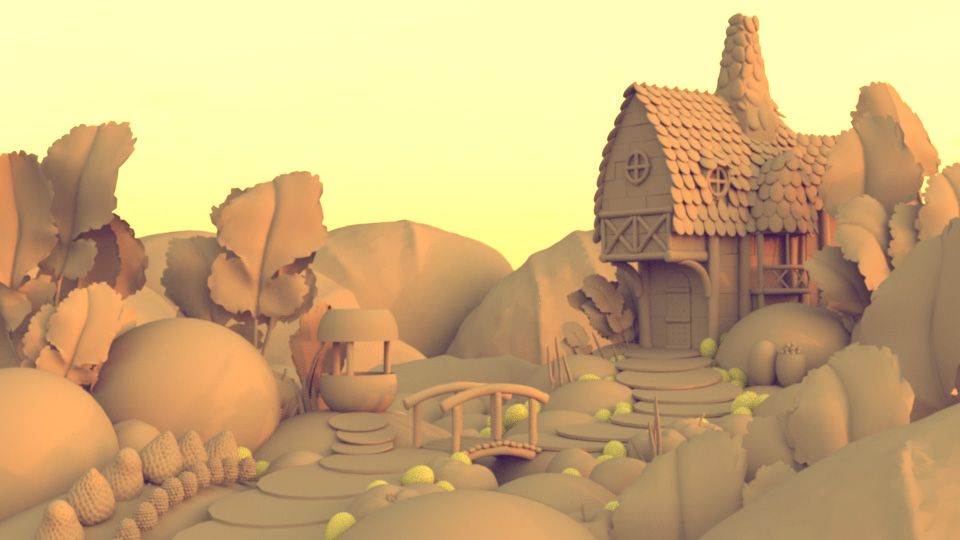
- Final Beauty image coming out of compositing.
More information:
Hinge Digital: https://new.hellohinge.com
NVIDIA Advanced Rendering: http://www.nvidia-arc.com
[0x1]: http://www.0x1-software.com
Original Music: Frederic Rouault http://thefrenchcomposer.com
Very impressive stuff. It was great to see the interior hard-surface scene shown here displayed at Nvidia’s GTC this year as an example of what iRay can do. I remember looking at that same image in the Nvidia forums last summer, and I was awestruck by it.
Keep up the good work guys, and thanks for this detailed and inspiring overview of the project.